Using a NodeMCU ESP8266 as a passthrough serial converter chip
I recently purchased a few Sonoff Basic R2 smart switches for some lights in our house that don’t have actual wall switches, but where I can access the wiring easily. These switches come pre-configured to use the Sonoff eWelink app which can link up with Google Home/Assistant, which seems ideal and relatively straightforward and easy. Of course, why would I take the easy way, when there’s a perfectly good, more difficult path I could follow where I’d learn more stuff!
So instead what I’ll be doing is replacing the Sonoff firmware on the switch with something custom, and writing my own code to control the switch. My idea is to get the switch talking over MQTT to a Raspberry Pi, which in turn will interface with Google Home.
A few other benefits to this method (aside from lots of learning):
- The switch won’t need to “phone home” to some random server controlled by some random company, passing along who-knows-what information, potentially including my home WiFi SSID and password.
- The switch should keep operating even if Sonoff ever decides to deprecate their app/servers.
- I don’t need yet another smart-home app on my phone, and particularly not one that demands a lot of unnecessary permissions
The first step I need to figure out for this whole project (and the sole topic for this post) is how to actually talk to this device.
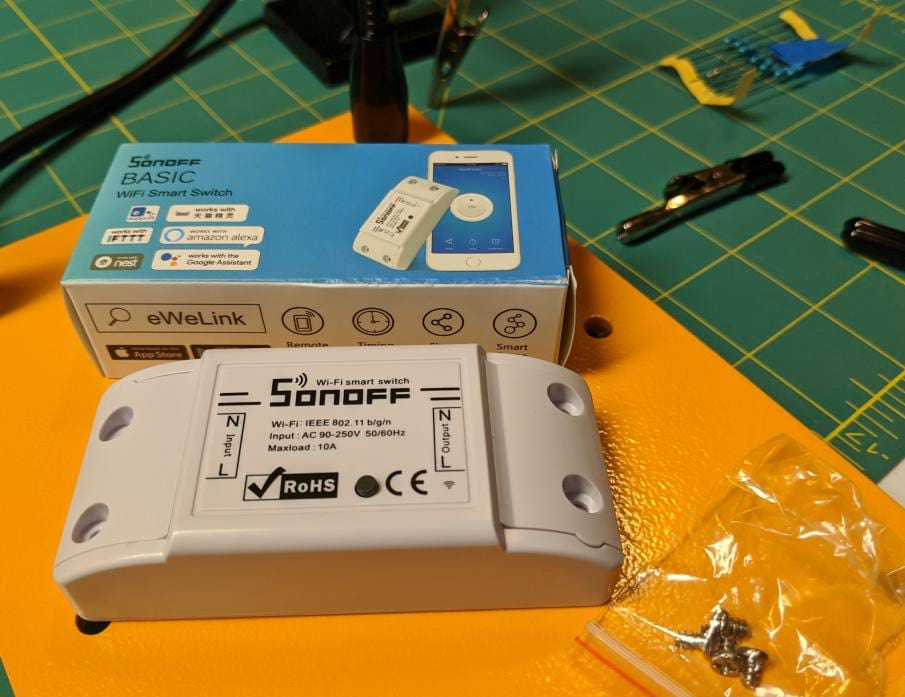
Sonoff Basic R2 switch
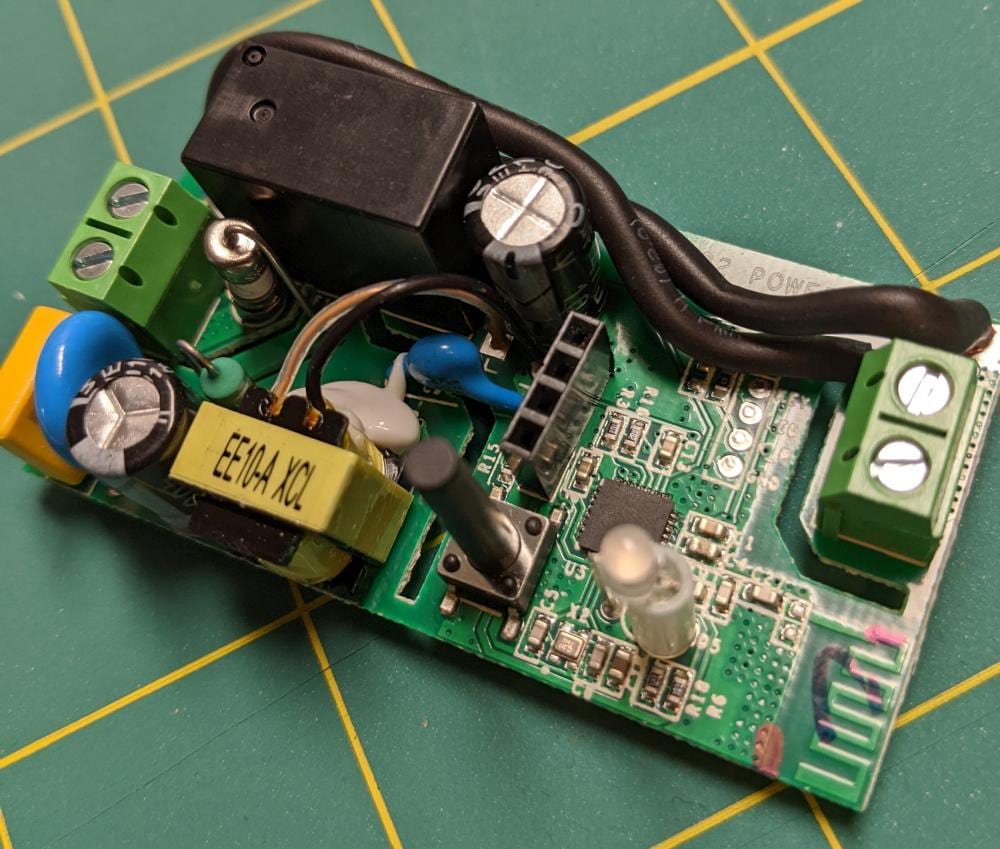
Here’s what the switch looks like out of the box:
Pop off the top cover, and you can see that inside this is a pretty simple PCB with a 3.3VDC power supply, an ESP8266 chip, and a relay to switch the mains power:
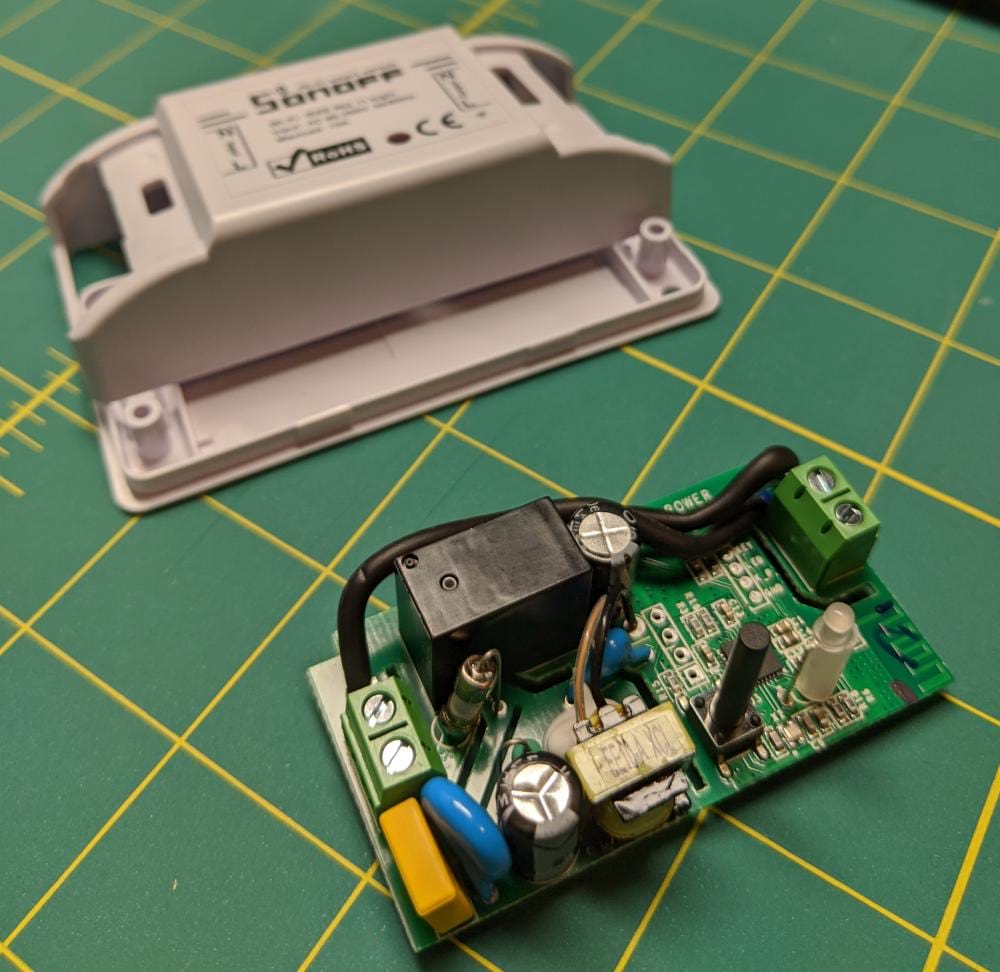
OK, so you can’t actually see all that from this picture, but trust me, that’s what’s there. Or don’t trust me and check one out for yourself.
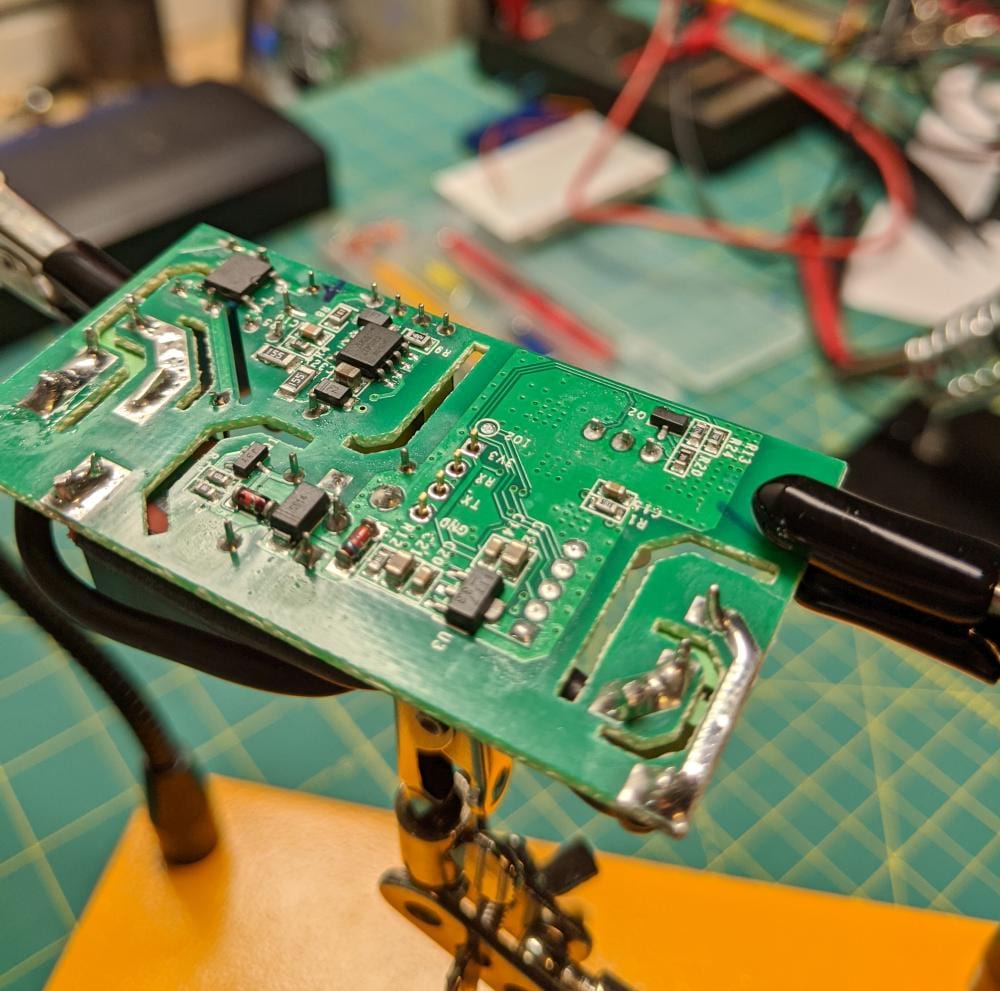
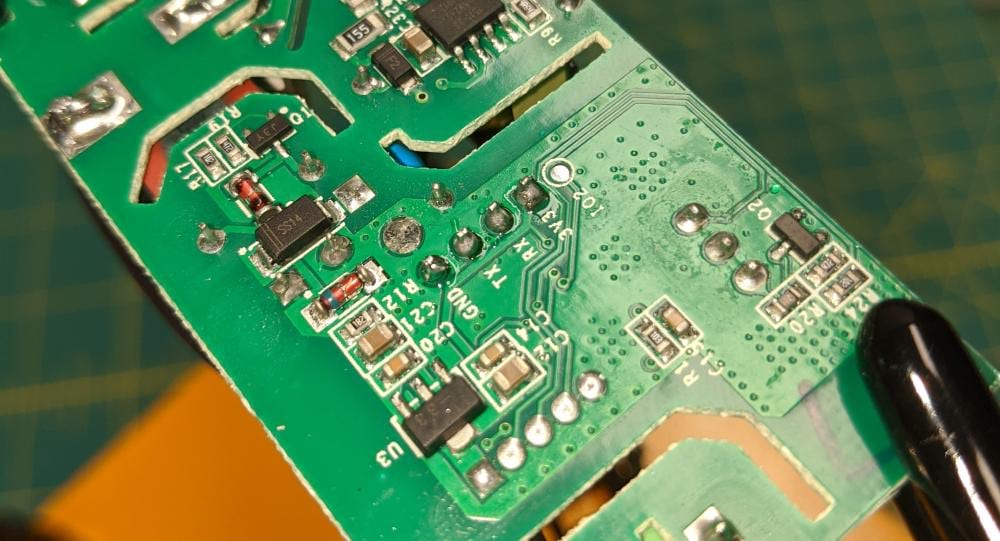
In order to upload some new firmware to this thing, I’m going to need to access the serial interface of the ESP8266. Thankfully, Sonoff made this (sort of) easy by providing pinouts for the 4 pins we need. You can see them labeled on the backside of the PCB:
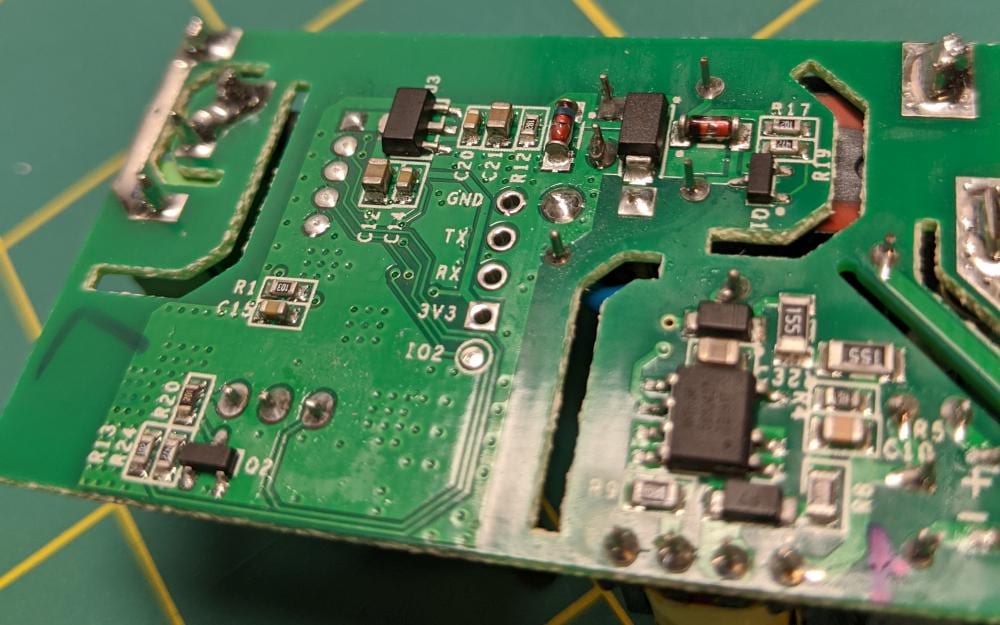
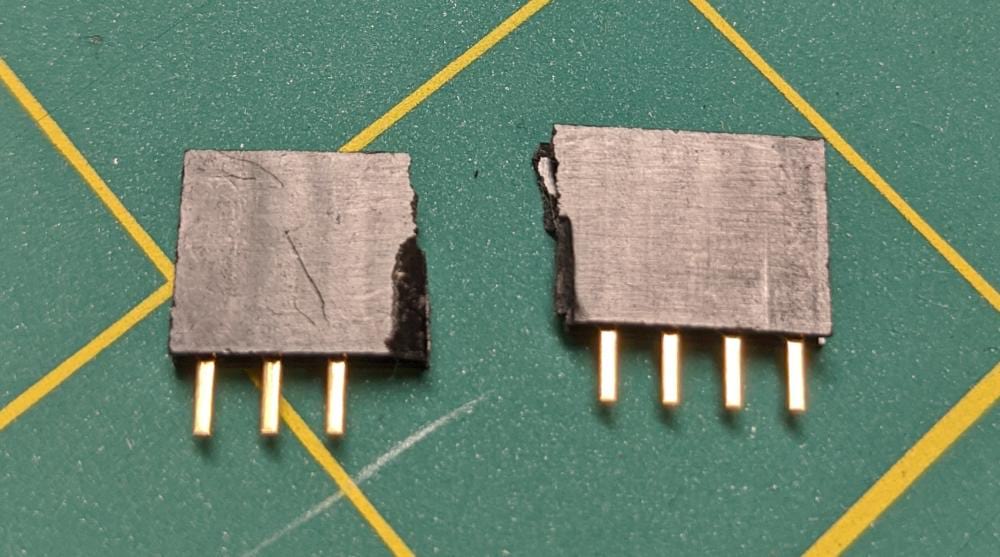
The only slight problem is that there’s no connector built into the board, but that’s easily solved by soldering in a 4-pin (0.1 inch, standard breadboard spacing) header. I didn’t have a 4-pin header handy, so I broke down an 8-pin that came with a previous Wemos D1 Mini development board:
Connecting to the ESP8266 chip
Now that I have the connection points in place, all I need is something to hook it up to my computer. The ESP8266 communicates over a serial port connection through the TX/RX pins. The easiest way to make this connection is using a USB-to-TTL serial converter, and you can find these for a few bucks on Banggood or Amazon. I ordered one from Amazon, but immediately realized that I didn’t want to wait the couple of days until it got here, so I started looking for other ways to make the connection.
I have a handful of other ESP8266 development boards laying around from other projects, and those do have a micro-USB connection built into the board. Since the actual ESP8266 chip on those dev boards is also using the same TTL serial connection, it stands to reason those boards must have a built-in converter somewhere. I just needed to figure out how to use it to feed the communication signal through to my Sonoff chip.
It took a while to find a Google query that actually pointed to some helpful links, and even then I didn’t find exactly what I was looking for, hence this post for future searchers (maybe future me).
Serial TTL bridging with NodeMCU ESP8266
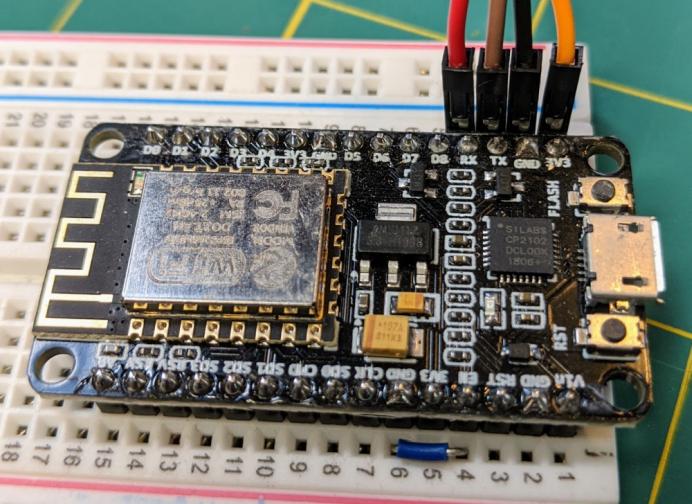
It’s actually pretty simple to get the NodeMCU to work as a bridge, and the real key is to draw the Enable pin (labeled “EN” on the board) to ground. This will keep the NodeMCU chip from turning on, and then it’s just a matter of passing the TX/RX/3V3/GND pins through to the Sonoff chip.
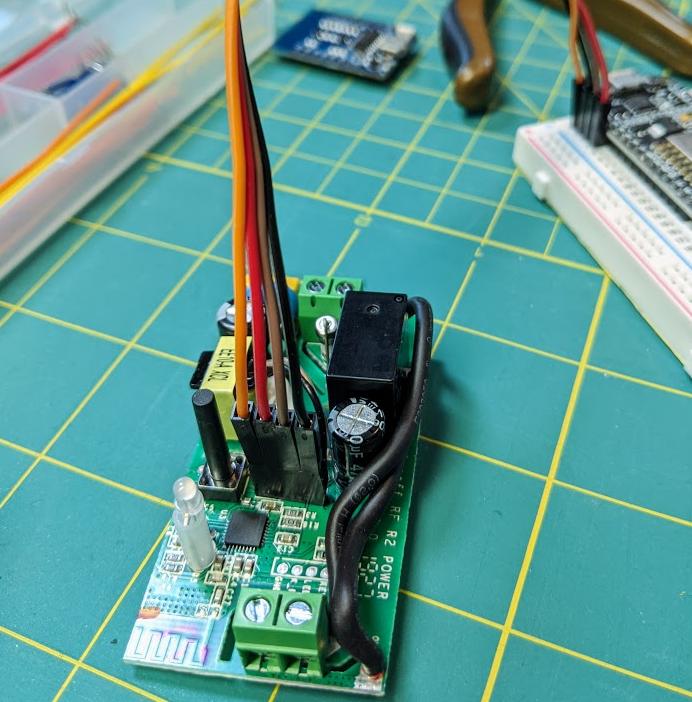
Here’s my quick breadboard wiring:
- NodeMCU GND -> NodeMCU EN
- NodeMCU 3V3 -> Sonoff 3V3
- NodeMCU GND -> Sonoff GND
- NodeMCU TX -> Sonoff TX
- NodeMCU RX -> Sonoff RX
Note: the RX/TX pins are “backwards” compared to other guides that assume you’re using a FTDI-type converter. In those cases, RX on the programmer go to TX on the Sonoff, and TX to RX. In my case, however, I’m using TX/RX as straight passthrough pins, so it’s TX->TX and RX->RX.
To make the connections, I’m just using simple Dupont/jumper wires between the NodeMCU and the Sonoff board. Make sure you check the pinout on both sides, since the ordering is slightly different between the two.
Preparing your computer
If you’re working on a Linux machine, you shouldn’t need any additional drivers. If you’re on Windows or macOS, though, you may need drivers to talk to (through) the NodeMCU board. The board I’m using as the bridge is this one from Amazon, which uses the CP2102 chipset, and you can find the drivers on the Silicon Labs website.
I’ll also use the esptool.py utility from Espressif for communicating with the ESP8266 ROM bootloader on the Sonoff chip. With Python already installed on your system, this is as easy as
$ pip install esptool
Connecting to the Sonoff Basic R2
When powered up, the Sonoff Basic normally comes up in “run mode”, and you won’t have access to the flash memory. To get around this, you’ll need to have the button held down on the Sonoff when you power it up via the 3.3VDC through the bridge.
With the jumper wire connections all made, but before plugging the NodeMCU into USB on your computer, hold down the button on the Sonoff. With the button still held down, connect your computer to the NodeMCU. You should not see any LEDs blink on either the NodeMCU or the Sonoff. If the NodeMCU LED flashes, it means it wasn’t properly disabled. Check the connection between EN and GND on the NodeMCU. If the LED on the Sonoff flashes, it means you didn’t have the button held down while you powered it up. Unplug the USB from the NodeMCU, hold down the Sonoff button, and connect again.
Note: if you’re using Windows and WSL to connect with
esptool.py, make sure you’re using WSL1 and not WSL2, since (as of early 2020) WSL2 does not support USB serial ports. See this GitHub issue for details. Windows CMD or PowerShell will work, and WSL1 will work.
Copy Sonoff flash to computer
If everything above worked, I’ll be able to copy the as-shipped firmware from the Sonoff to my PC. I want to keep a copy of this in case I decide to revert later on.
Once you have everything connected up, try running the command below and check the output.
$ esptool.py flash_id
esptool.py v2.8
Serial port /dev/ttyS5
Connecting....
Detecting chip type... ESP8266
Chip is ESP8285
Features: WiFi, Embedded Flash
Crystal is 26MHz
MAC: d8:f1:5b:c6:f8:31
Uploading stub...
Running stub...
Stub running...
Manufacturer: 51
Device: 4014
Detected flash size: 1MB
Hard resetting via RTS pin...
This command reads the flash manufacturer and device ID, and (importantly) tells me what size the flash is.
Note: most of the
esptool.pycommands will reset the board at the end. Since we’re not holding down the Sonoff button during this, the board will not come back up in flash mode. This means after each command, I’ll need to unplug the USB, hold down the Sonoff button, and plug the USB in again. It’s possible that the serial port number will change each time I do this as well.
To copy the as-shipped firmware binary, I’ll use the read_flash command.
Note: the second hexadecimal parameter below (
0x100000in my case) relates to the size of the onboard flash. Mine is 1MB, so I use0x100000if you have a 4MB flash instead, you would use0x400000instead. The first hex parameter is the starting byte to read, and the second is the ending byte to read, hence 0x100000 (hex) is 1048576 bytes (decimal).
$ esptool.py --port /dev/ttyS5 read_flash 0x00000 0x100000 image1M.bin
esptool.py v2.8
Serial port /dev/ttyS5
Connecting....
Detecting chip type... ESP8266
Chip is ESP8285
Features: WiFi, Embedded Flash
Crystal is 26MHz
MAC: d8:f1:5b:c6:f8:31
Uploading stub...
Running stub...
Stub running...
1048576 (100 %)
1048576 (100 %)
Read 1048576 bytes at 0x0 in 95.9 seconds (87.5 kbit/s)...
Hard resetting via RTS pin...
The file will be in my current directory now, named image1M.bin. I have a few of these Sonoff devices, and I’m not sure the firmware is interchangeable, even between identical models, so I’m going to save each one with a separate filename.
Restoring from a firmware backup
I’m not going to get into the custom code I want to write in this post, but I will point out how to erase and reflash the backup firmware:
Erase flash
Don’t forget to reboot the Sonoff with the button held down first.
# esptool.py --port /dev/ttyS5 erase_flash
esptool.py v2.8
Serial port /dev/ttyS5
Connecting....
Detecting chip type... ESP8266
Chip is ESP8285
Features: WiFi, Embedded Flash
Crystal is 26MHz
MAC: d8:f1:5b:c6:f8:31
Uploading stub...
Running stub...
Stub running...
Erasing flash (this may take a while)...
Chip erase completed successfully in 3.5s
Hard resetting via RTS pin...
Upload flash
Don’t forget to reboot the Sonoff with the button held down first.
Assuming you’re in a directory that has the image1M.bin (or whatever you named it) inside:
$ esptool.py --port /dev/ttyS5 write_flash -fs 1MB -fm dout 0x0 image1M.bin
esptool.py v2.8
Serial port /dev/ttyS5
Connecting....
Detecting chip type... ESP8266
Chip is ESP8285
Features: WiFi, Embedded Flash
Crystal is 26MHz
MAC: d8:f1:5b:c6:f8:31
Uploading stub...
Running stub...
Stub running...
Configuring flash size...
Compressed 1048576 bytes to 316863...
Wrote 1048576 bytes (316863 compressed) at 0x00000000 in 28.1 seconds (effective 298.6 kbit/s)...
Hash of data verified.

Leaving...
Hard resetting via RTS pin...
Notes:
- Change
-fs 1MBto the size of your actual image - Change
image1M.binto the name of the binary you want to restore from - Check what flash mode you need for your particular board, using the Espressif documentation as reference.
doutwas correct for the Sonoff Basic R2, but yours may be different.
Note: if you buy a product from Amazon using any of the links in this post, I may be rewarded with a small commission.